 1000+ 5 Star Google Reviews
 Order by 12pm for SAME DAY Dispatch
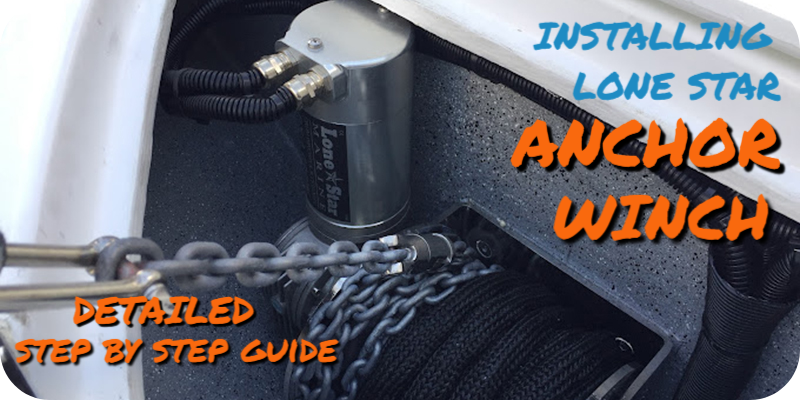
Step by Step Anchor Winch Installation Guide
"Embarking on the installation of your Lone Star Anchor Winch may seem like a detailed step-by-step process, but rest assured, it's crafted to be straightforward and manageable for boating enthusiasts of varying skill levels. The intricate guidance provided here doesn't imply complexity; rather, it serves as a comprehensive roadmap ensuring a smooth installation journey. Engaging in this DIY venture not only offers a sense of accomplishment but also grants boaters an elevated level of satisfaction when setting sail, knowing the anchor winch was personally installed. The hands-on approach enriches the boating experience, fostering a deeper connection with the equipment, and instilling confidence in its reliable operation out on the water" From the Author
Step-by-Step Guide for Installing a Lone Star Anchor Winch on Your Boat
1. Tools and Materials Checklist:
-
Lone Star Anchor Winch Kit: Ensure you have the complete anchor winch kit as provided by the manufacturer, including the main winch unit, switch panel, circuit breaker, backing plate, and accompanying hardware.
-
Drill: A power drill suitable for creating holes in the mounting surface as per the winch's installation instructions. Ensure it's compatible with the drill bit size required for the fasteners.
-
Screwdrivers: Both flathead and Phillips-head screwdrivers of appropriate sizes for different fastening requirements during installation.
-
Wrenches: Adjustable wrenches or socket wrenches to tighten and secure bolts and nuts. Ensure they fit the sizes specified by the winch's installation manual.
-
Electrical Wiring and Connectors: High-quality electrical wiring suitable for marine use, matching the gauge recommended by the manufacturer. Connectors such as terminals, crimps, and heat-shrink tubing for secure electrical connections.
-
Bolts, Nuts, and Washers: Assortment of bolts, nuts, and washers compatible with the winch's mounting requirements. Verify sizes and types specified in the installation manual.
-
Sealant: Marine-grade sealant/adhesive recommended for sealing gaps and holes, preventing water intrusion, and enhancing the installation's durability.
-
Appropriate Fasteners: Ensure you have the specific fasteners recommended by the manufacturer for securing the winch to the mounting surface. This may include stainless steel or galvanized hardware for corrosion resistance in marine environments.
Additional Recommended Tools:
- Tape Measure: For precise measurements and alignment.
- Marker/Pen: To mark drilling points accurately.
- Level: To ensure proper alignment during installation.
- Wire Cutters/Strippers: For preparing and trimming electrical wiring.
- Safety Equipment: Safety goggles, gloves, and appropriate personal protective equipment (PPE) for safe installation practices.
Before commencing the installation, double-check the Lone Star Anchor Winch manual, see Lone Stars information on Components to confirm the specific tools and materials recommended by the manufacturer for your particular model. This ensures a smooth and successful installation process.
2. Select the Mounting Location:
Choose a suitable location on your boat for mounting the anchor winch. The Lone Star Anchor Winch typically offers three possible mounting positions on a boat:
-
Deck Mount: This positioning involves mounting the winch on the deck of the boat, usually close to the bow. It's essential to ensure the deck is reinforced adequately to support the winch's weight and that the location doesn't obstruct other essential components.
-
Below Deck Mount: This position involves installing the winch below deck, often in an anchor locker or a dedicated compartment. Ensure sufficient space for the winch's operation and adequate ventilation to prevent overheating. Additionally, verify easy access for maintenance and repairs.
-
Bow Sprit Mount: Mounting the winch on a bow sprit involves affixing it to an extended structural component at the boat's bow. This positioning aids in keeping the anchor away from the boat's hull and minimizes potential damage. Ensure the bow sprit is sturdy and compatible with the winch's weight and operation.
For each mounting position, consider factors such as weight distribution, accessibility, interference with other boat elements, and reinforcement to guarantee a secure and functional installation. Always refer to the manufacturer's guidelines and, if uncertain, consult a professional for guidance.
3. Prepping the Mounting Surface:
-
Clearing and Cleaning: Begin by thoroughly clearing the chosen mounting area. Remove any debris, remnants of previous installations, or objects that might obstruct the winch's placement or operation. Clean the surface meticulously to ensure a smooth and stable base for mounting.
-
Assessing Structural Integrity: Inspect the mounting surface for its structural integrity. Check for any signs of weakness, cracks, or damage that might compromise the stability of the installation. Reinforce the area if necessary, utilizing appropriate materials or structural enhancements to fortify the surface and ensure it can withstand the winch's weight and movement.
-
Surface Treatment: Consider surface treatment if applicable. Some materials may benefit from priming, sealing, or applying protective coatings to prevent corrosion, enhance durability, or provide additional support. Follow manufacturer recommendations or consult with professionals for specific surface treatments suitable for the mounting area.
-
Securing the Foundation: Prior to mounting, ensure the area is dry and adequately prepared to accept the installation. Securing a solid foundation guarantees a stable and long-lasting attachment for the winch, reducing the risk of movement, vibration, or potential damage during its operation.
4. Position the Winch Accurately:
Positioning the Lone Star Anchor Winch accurately is pivotal for a successful installation:
-
Placement: Carefully place the anchor winch on the designated mounting location, ensuring it aligns with the chosen spot on the boat's deck or below deck area.
-
Marking Holes: Once positioned, mark the spots for drilling holes that will secure the winch in place. Use a marker or pen to clearly indicate the drilling points, ensuring they match the winch's designated mounting pattern.
-
Alignment Verification: Before proceeding further, confirm the winch's alignment with the boat's structure. Ensure it sits level and doesn't interfere with other essential boat components, such as hatches, compartments, or rigging.
-
Clearance Check: Verify that the winch's placement allows for unobstructed movement and operation. Ensure it doesn't hinder any access points or impede other functionalities on the boat.
-
Consideration of Anchor Rode Path: Additionally, consider the path of the anchor rode (rope or chain) concerning the winch's positioning. Ensure a clear and unobstructed path for the anchor rode from the winch to the anchor locker or bow sprit, maintaining proper functionality during anchoring."
5. Drill Mounting Holes & Securely Attaching the Winch:
-
Drilling Holes: With the marked spots as a guide, carefully drill holes into the mounting surface using an appropriately sized drill bit. Ensure the holes match the specified diameter and depth indicated in the Lone Star Anchor Winch's installation manual. It's crucial to maintain precision to accommodate the fasteners accurately.
-
Ensuring Precision: Take care to drill the holes with precision, maintaining alignment and spacing according to the marked positions. Use a level to confirm that the drill is perpendicular to the surface for precise hole creation.
-
Preparing for Fastening: After drilling, clean the holes to remove any debris or residual material, ensuring a smooth surface for the fasteners. Additionally, consider applying a sealant to the holes to prevent water intrusion and enhance the durability of the mounting points.
-
Securing the Winch: Align the Lone Star Anchor Winch over the drilled holes and begin securing it in place. Utilize the supplied fasteners, usually bolts and nuts, to fasten the winch securely to the mounting location. Confirm that the fasteners match the recommended specifications in terms of size, material, and torque strength as per the manufacturer's instructions.
-
Stable Installation: Tighten the fasteners evenly and securely, ensuring a stable and robust installation. Use appropriate tools like wrenches or socket wrenches to achieve the required torque without over-tightening, which could damage the mounting surface or the winch itself. Verify that the winch is firmly attached and doesn't exhibit any movement or looseness.
-
Double-checking Stability: Once fastened, perform a final check to ensure the winch is firmly affixed to the mounting location. Gently test the winch for any unexpected movement or instability, confirming a secure and reliable attachment before proceeding with the next installation steps."
6. Connecting Electrical Wiring for the Anchor Winch:
-
Power Source: Start by locating the appropriate power source for the anchor winch. Typically, this involves connecting to the boat's battery system, either the primary starting battery or a dedicated deep-cycle battery.
-
Battery Selection: If using the primary starting battery, ensure its capacity aligns with the winch's power requirements and doesn't excessively drain the battery during anchor use. Alternatively, for frequent anchoring or larger vessels, a dedicated deep-cycle battery is recommended to avoid compromising the starting battery's performance.
-
Wire Gauge and Length: Determine the correct wire gauge for the winch's power and ground wires based on the manufacturer's specifications. Use marine-grade tinned copper cables of appropriate length to reach from the winch location to the battery, allowing for some slack for installation flexibility.
-
Circuit Protection: Install an appropriate fuse or circuit breaker near the battery's positive terminal to safeguard against electrical overloads and prevent damage to the winch or the boat's electrical system. Follow the manufacturer's recommendations for the correct fuse or breaker size based on the winch's power rating.
-
Power and Ground Connections:
-
Power Connection: Connect the winch's positive power wire to the positive terminal of the battery or the designated positive busbar, ensuring a secure and tight connection. Use appropriate terminals and connectors for a reliable and corrosion-resistant joint.
-
Ground Connection: Connect the winch's negative or ground wire to the boat's grounding system or the negative terminal of the battery. Ensure a solid and clean connection, free from corrosion or loose fittings, to facilitate proper grounding and efficient electrical flow.
-
-
Testing and Protection:
-
Testing the Connection: Before finalizing the wiring, conduct a preliminary test to ensure the winch operates correctly. Test the winch's functions, such as raising and lowering the anchor, to verify proper electrical connectivity and functionality.
-
Waterproofing and Insulation: Once confirmed, protect the electrical connections using marine-grade heat-shrink tubing or waterproof electrical tape to shield against moisture and corrosion. Additionally, route and secure the wiring away from potential hazards or areas prone to chafing to maintain its integrity.
-
-
Final Checks and Safety Measures: After securing the wiring, perform a final inspection to ensure all connections are securely fastened, properly insulated, and routed safely. Double-check for any potential issues or loose connections before using the winch in actual anchoring operations. Regularly inspect the wiring and connections as part of routine boat maintenance to ensure continued reliability.
Anchor Winch Wiring Tips from Malki, Lone Star CEO
7. Route the Anchor Rode for Optimal Winch Operation:
-
Selecting the Anchor Rode: Choose the appropriate anchor rode, whether it's a combination of rope and chain or solely rope, based on your boating needs and the recommendations outlined by the manufacturer. Ensure the rode's material and strength align with the winch's specifications for safe and efficient anchoring.
-
Preparation and Securing: Prepare the selected anchor rode for threading through the winch's drum. If using a combination of rope and chain, securely attach the rope to the chain using suitable connectors or splicing methods, ensuring a reliable and secure union between the components.
-
Threading the Anchor Rode: Carefully thread the anchor rode through the winch's drum according to the manufacturer's instructions. Start by feeding the rope or chain through the designated entry point on the winch, ensuring it follows the correct path guided by the winch's configuration.
-
Proper Securing: As you thread the rode through the winch, maintain tension and guide it evenly onto the drum. Ensure the rope or chain is neatly spooled and doesn't overlap or tangle, as this can affect the winch's performance during anchor deployment and retrieval.
-
Clear Pathway: Verify that the anchor rode's path remains unobstructed and free from any entanglements or obstacles. Check for any potential friction points or areas where the rode might snag during operation, ensuring a smooth and unimpeded pathway for the rode as it moves through the winch.
-
Testing and Adjustment: After threading the rode, perform a trial run of the winch to test its functionality. Raise and lower the anchor to confirm that the rode operates smoothly and without any irregularities. Make any necessary adjustments to the routing or tensioning of the rode to ensure optimal performance.
-
Regular Inspection: Regularly inspect the anchor rode and its pathway as part of routine maintenance. Check for signs of wear, fraying, or damage to the rode, and ensure it remains correctly routed and free from any potential hazards that could affect its functionality during anchoring operations."
How to attach Rope & Chain with Malki, Lone Star Marine.
8. Test the Winch's Functionality:
-
Pre-Deployment Checks: Before the actual anchoring process, it's crucial to conduct comprehensive tests to ensure the Lone Star Anchor Winch functions as expected:
-
Electrical Integrity: Begin by confirming the integrity of the electrical connections. Check all the wiring connections to the battery or power source, ensuring they are secure and properly insulated. Test the winch's control panel or switch for responsiveness, ensuring it initiates the winch's operation smoothly.
-
Functional Testing: Activate the winch using the control mechanism to raise and lower the anchor (without actually deploying it into the water). Observe the winch's performance, ensuring it operates smoothly and without any unusual noises, hesitations, or jerky movements.
-
Rope and Chain Alignment: While testing, pay attention to the alignment and movement of the anchor rode (rope or chain) as it spools or unspools from the winch drum. Confirm that the rode feeds onto the drum evenly and without tangling or overlapping.
-
Anchoring Operation Simulation: Mimic anchoring scenarios by running the winch through various speeds and load conditions, simulating the actual anchoring process. Verify the winch's capability to handle different loads smoothly, ensuring it doesn't strain or exhibit any irregular behavior under varying conditions.
-
Lowering and Raising: Test both the lowering and raising functions of the winch separately. Observe the winch's control over the anchor's descent and ascent, ensuring it provides precise and controlled movements without sudden drops or erratic motions.
-
Monitoring and Adjustment: During the test, monitor the winch closely for any signs of overheating, unusual sounds, or vibrations. If any irregularities are detected, stop the test immediately and inspect the winch for potential issues. Make necessary adjustments or seek professional assistance if needed.
-
Final Confirmation: Once satisfied with the winch's performance and operation during the test, power off the winch and verify that all components are in their correct positions. Ensure the winch is ready for actual anchoring operations and confidently deploy the anchor knowing that the winch is functioning as intended."
9. Secure Loose Cables:
Securing loose cables is pivotal to maintaining a tidy and hazard-free environment on your boat. Once the Lone Star Anchor Winch is installed and fully operational, take the time to gather any excess or dangling cables. Use cable ties, clamps, or cable management solutions to neatly bundle and fasten these wires, ensuring they're tucked away from moving parts or areas prone to water exposure. This preventive measure not only minimizes the risk of entanglement but also safeguards against potential damage caused by loose cables interfering with other crucial boat components during regular boating activities.
10. Perform Operational Checks:
Before setting sail or using the anchor winch in real anchoring scenarios, conducting a thorough operational check is essential. Take a moment to meticulously inspect all the connections, from the electrical wiring to the battery terminals, ensuring they're snug, corrosion-free, and properly insulated. Verify the tightness of the mounting hardware, confirming that the winch is securely affixed to the boat's surface without any loose fittings. Engage the winch controls to validate its functionality once again, testing both the raising and lowering operations to guarantee a smooth and responsive performance. This final inspection serves as a last checkpoint, ensuring the Lone Star Anchor Winch is primed and ready for dependable operation when needed on your boating adventures.
11. Prioritize Safety Measures:
Always adhere to safety precautions during anchor winch use, and make sure you and your crew are well-versed in its operation for safe and efficient anchoring.
For specific instructions and guidelines tailored to your Lone Star Anchor Winch model, consult the installation pdf. If you're uncertain about any step, consider get in touch with Boat Hardware or Lone Star Marin to ensure a secure and reliable installation.
SUPPORT, We've got you Covered!
"Remember, you're never alone in this process! Both Lone Star Marine and Boat Hardware stand ready to offer comprehensive support and guidance at every step of your anchor winch installation journey. Whether you're just starting or have specific queries midway through the process, our experienced teams are here to lend a helping hand. Don't hesitate to reach out; we take pride in ensuring your installation experience is not just successful but also enjoyable. Your confidence and satisfaction matter to us, and we're committed to providing the assistance needed to make your boating ventures with the Lone Star Anchor Winch an absolute delight."
All boats and requirements are different, however here is a list with images of components you may require for your install. See complete list of Anchor Winches & Accessories.
- Anchor Winch – all winches are sold complete with switch panel, circuit breaker, backing plate, nuts, bolts and washers
- Wiring looms – plug and play premade or custom looms for installtion of your anchoring system
- Double braid nylon rope – high strength small diameter rope for maximum capacity
- Short link chain – high quality galvanized short link chain for maximum weight and drum capacity
- Anchor swivel – prevents line twist and assists in anchor placement into bow sprit
- Anchor – quality anchors to work perfectly with your bow sprit for easy drop and retrival
- Bow Spirit – holds your anchor in place at the bow
- Deck roller – for feeding the rode (rope & chain) onto the drum
- Hawse pipe – used for internal mounts with no anchor well. Round for long distance-Wide for short distance
- Chain Guard – LSM original product for keeping the noise down and protecting your boat
How to Install Lone Star Anchor Winch (Complete Video)